

Tutorial videos are an effective way to share knowledge and help others learn a new skill or task. With the rise of online education and social media, tutorial videos have become increasingly popular and accessible.
Whether you are an expert in a specific field or have a passion for teaching others, making a tutorial video can be a fun and rewarding experience. Also, our guide will walk you through making a tutorial video using iTop Screen Recorder.
We will cover everything from planning and preparation to recording and editing so that you can create a professional-looking tutorial video in no time.
So, whether you are an experienced video maker or a beginner, let us get started!
Best Way to Capture Screen Recording in 2023
To start with, you’ll need to gather resources for your tutorial. This may include images, text, and audio. The images should be clear and high-quality, and the text should be easy to read and understand.
iTop Free vs Paid Recording
iTop Screen Recorder comes in two versions – free and paid. The paid version has no watermark, while the free version has a watermark. The free version is perfect for those who want to try out the software and see if it works for them.
Record a Tutorial Video with iTop Screen Recorder
Here’s how to use iTop screen recorder to make your tutorial video.
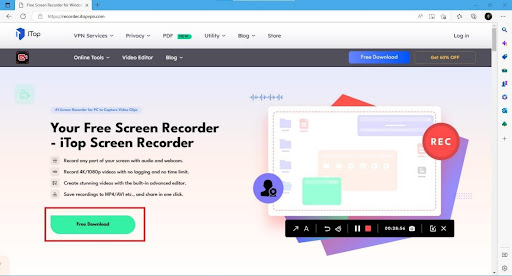
Step 1: Simply Download and Install iTop Windows Screen Recorder
The first step is to download and install iTop Screen Recorder for windows 10. The process is straightforward and shouldn’t take too long. Once you’ve installed the software, you’re ready to get started.
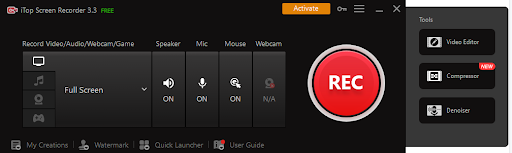
Step 2: Configure the Settings
Before you begin recording, it’s important to configure the settings to ensure optimal performance. You can use your microphone to record your voice, a webcam to capture your face, and choose the location where the recorded video will be saved.
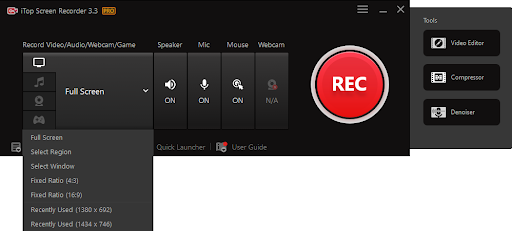
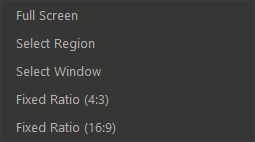
Step 3: Choose the Recording Mode
iTop Screen Recorder offers three recording modes – full screen, window, or custom area. Choose the one that best fits your needs, depending on what you want to capture.
Step 4: Start Recording
Now it’s time to start recording! You can use the F9 key to start and stop the recording or the F10 key to pause and resume. Start recording and presenting the content of your tutorial.
Step 5: Stop the Recording
When you’re done, hit the F9 key to stop the recording. The video will be saved to the location you specified in the settings.
With iTop windows 11 screen recorder, you can easily capture the screen. It’s an intuitive interface for anyone who wants to capture their screen activity and turn it into a video.
Editing the Video with Built-in Video Editor
Once you finish the completed video tutorial using an iTop screen recorder for MAC, it lets you remove any irrelevant parts with a built-in video editor to make them more professional and polished.
The video editor has two options – a simple option and an advanced option.
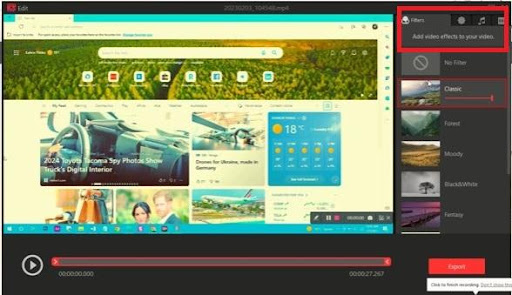
Simple Mode – Clip Editing
The simple option lets you change filters and add symbols, while the advanced option allows you to trim the video, add captions and images, and adjust audio levels.
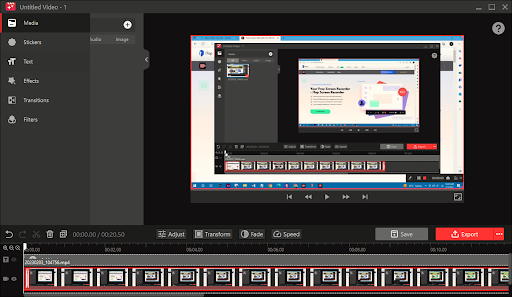
Advance Video Editing
With the advanced option, you can trim the video to remove any unwanted parts. This feature is especially useful if you recorded more than what you needed or if there were any mistakes.
The advanced option allows you to add captions, images, and other resources to your video. This can help to provide additional information or context to the viewers.
Finally, you can adjust the audio levels and add background music to your video. That being said, if you are looking for Screen recording software with audio recording, then iTop is highly recommended.
This will help improve the video’s overall quality and make it more engaging for the viewers.
Share & Export Your Screen Recording
Exporting your iTop Screen Recorder video is quick and easy, and you can be confident that your video will look great in your desired format and quality. Whether you are using iTop Screen Recorder for professional screen recordings or just for personal use, you can be sure that your videos will be of the highest quality.
Here is how to do it.
- Choose your format and quality: iTop Screen Recorder offers a variety of export formats, including MP4, AVI, and WMV. You can also choose the quality of your exported video, from standard to high definition.
- Export the video: Once you have selected your desired format and quality, you can export the video to your desired location. Click on the export button and select the location where you want to save the video.
Filmora-AI Thumbnail for Video
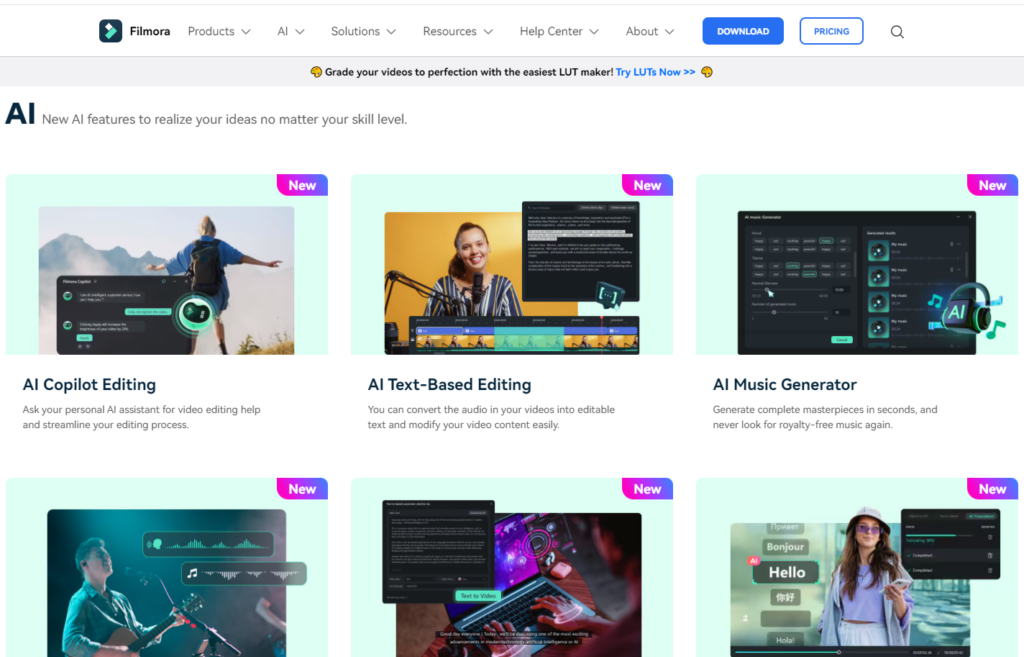
Filmora-AI Thumbnail for Video – the ultimate solution for creating eye-catching thumbnails that will elevate your video content and boost viewer engagement. Our sophisticated tool leverages advanced AI technology to help you craft compelling visuals that stand out in a crowded digital landscape. Here’s why Filmora-AI Thumbnail for Video is the must-have tool for content creators:
Key Features:
3 Best Shots Analyzed From Video Content
Filmora-AI smartly analyzes your video content and automatically selects the three best shots that perfectly encapsulate your message, ensuring that your thumbnails are as engaging as possible. Say goodbye to manually sifting through footage – let our AI do the heavy lifting for you!
Effortless Thumbnail Customization
Whether you’re a seasoned designer or new to visual editing, Filmora-AI allows for seamless thumbnail customization. Its user-friendly interface ensures you can create stunning thumbnails with minimal effort, giving you more time to focus on creating amazing content.
58 Preset Templates for Different Themes
With an extensive library of 58 preset templates catering to various themes, you’ll never run out of creative options. From travel vlogs and educational content to tech reviews and beauty tutorials, Filmora-AI has a template that suits every genre.
Supports Advanced Text & Image Editing
Take your thumbnails to the next level with Filmora-AI’s advanced text and image editing capabilities. Adjust fonts, colors, and layouts effortlessly, or overlay custom images to achieve a truly unique look that captures your audience’s attention.
Why Choose Filmora-AI Thumbnail for Video?
- Automated Excellence: Harness the power of AI to automatically identify and utilize the best frames, making the thumbnail creation process faster and more efficient.
- Creative Freedom: With a plethora of customizable templates and advanced editing tools, unleash your creativity without any restrictions.
- User-Friendly: Designed for both novices and experts, the intuitive interface makes designing professional-grade thumbnails an absolute breeze.
- Increased Engagement: High-quality thumbnails can significantly enhance your video’s click-through rate (CTR). Let Filmora-AI help you make the first impression count.
Elevate Your Videos Today
Never again settle for dull, uninspiring thumbnails. With Filmora-AI Thumbnail for Video, you can easily create vibrant, professional-looking thumbnails that draw in your audience and keep them engaged. Elevate your video content and let your creativity shine with the unparalleled capabilities of Filmora-AI.
Get started today and make every thumbnail count with Filmora-AI Thumbnail for Video!
Conclusion
To sum up, iTop Screen Recorder is a valuable asset and known to be the best screen recording software for Windows for anyone looking to capture their screen activities. Its advanced features offer a versatile solution for creating high-quality screen recordings for professional or personal use.