
")
How To Fix Quickly Ethernet Not Working In Windows 11 will be described in this article. Although Wi-Fi connections have greatly improved, everything is fine with the speed and ease of an ethernet connection. Many individuals prefer Ethernet connections over Wi-Fi because they are more steady and trustworthy. However, several customers have complained that the Ethernet connection with Windows 11 is not working. Keep reading to learn how to determine this issue if you are also facing it. This issue is caused mainly by damaged ethernet drivers in Windows 11. Other issues, however, might be attributed to this error. The troubleshooting methods listed below can assist you in swiftly resolving any network connectivity issues.
How To Fix Quickly Ethernet Not Working In Windows 11
In this article, you can know about How To Fix Quickly Ethernet Not Working In Windows 11 here are the details below;
Check Ethernet Cable & Connection
Before you begin with more advanced methods, ensure the Ethernet wire is hooked to the Ethernet port on your PC and the router. Then, check the cable to verify if it’s not damaged; try another cable to see whether it works.
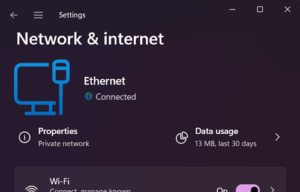
Check Network Status In Settings
Check the network status in settings to ensure that it reads Connected. If there’s an error, it will show Action Needed. This is how you do it.
- Navigate to Settings > Network & Internet.
- Check the top to see whether it says Connected.Ethernet Not Working
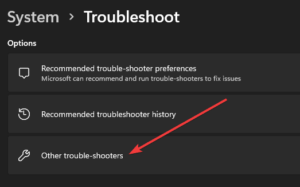
Run Windows Network Troubleshooter
Running the network troubleshooter will automatically identify and resolve the issue. To execute the network troubleshooter, follow the steps outlined below.
- Select Start > Settings > System > Troubleshoot > Other Troubleshooters from the menu.Ethernet Not Working
- Scroll down & click the Run button next to Network Adaptor.Ethernet Not Working
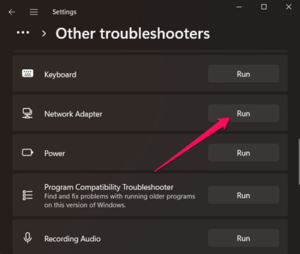
- Windows will now check for and automatically repair any Network Adaptor issues.
Run Network Commands
Run network instructions to reset the TCP/IP stack manually. The IP address is then released and renewed, and the DNS client resolves the cache is refreshed. To do so, follow these steps.
As an administrator, launch Command Prompt.
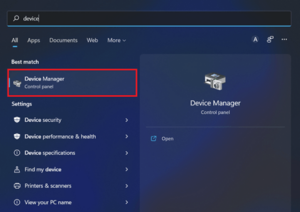
Reinstall Ethernet Network Adapter Drivers
You may have this issue if you use faulty or outdated Ethernet network adapter drivers. Also, consider using this method if your network connection stops working after a recent upgrade. This is how you do it.
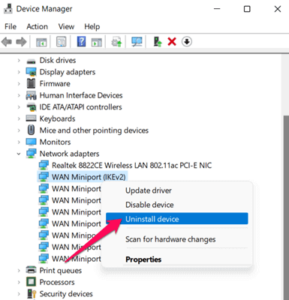
- Open Device Manager by right-clicking Windows.Ethernet Not Working
- Expand the section Network Adapters.
- Pick Uninstall machine from the context menu when you right-click on the driver. After that, restart your PC.
- Reopen Device Manager and check to see if the driver is still installed.
- If the driver isn’t installed, go to Device Manager’s Action tab and choose Scan For Hardware Changes. The driver will be installed on the PC as a result.
Perform Network Reset
Well, if you continue to have problems connecting to an internet connection through Ethernet, try performing a network reset on your device. A network reset will clear all network adaptors and their settings. Then, all adaptors are reinstalled to their default settings once the PC restarts. This is how you do it.
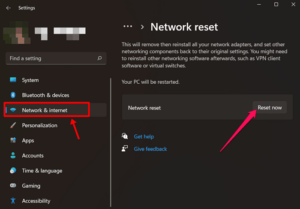
- Navigate to Start > Settings > Network & Internet > Advanced network settings > Network Reset.
- On the network reset page, click Reset Now and then Yes to confirm.
- Your device will now restart itself.
- Check whether the PC can connect to the internet after rebooting your device.
Power Cycle Modem & Wireless Router
Power cycling the modem and wireless router will aid in the establishment of a new connection with your ISP. While accomplishing so, everyone connected to the network will be momentarily unplugged. These instructions may differ counting on the device, but here are the typical ones.
- Unplug the router and modem’s power cables.
- Wait at short thirty seconds before reconnecting the modem and router.
- Wait a few moments for the modem and router to turn on.
- Try connecting again using your PC’s Ethernet connection.
Connect To Wi-Fi Network
Attempt connecting to a Wi-Fi network instead if your router supports it. This will assist you in getting connected to the internet and locating the issue’s source. Also check
Reset PC
If none of the above steps were successful, reset your PC. Sometimes the error is contained in Windows core files, which cannot be directly examined. Here’s how to factory reset your PC.
- Navigate to Settings > Windows Update > Advanced Settings > Recovery.
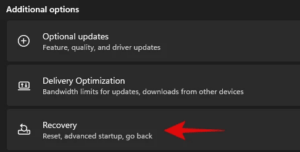
- Finally, click Reset this PC and follow the on-screen directions.

Conclusion:
That’s all there is to it for how to fix an Ethernet connection that is not working in Windows 11. We hope that the troubleshooting methods listed above were helpful to you. If you’re still facing the issue, it may be a hardware problem, and you should contact the local service facility of your device OEM to repair it. If you’ve any recommendations or questions, please leave them in the comments area.